Audprops

Props Manager Work
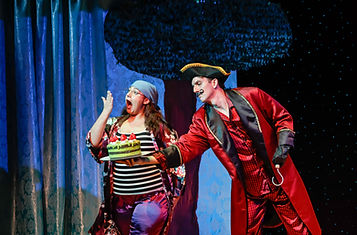
Deck the Halls

To make the presents, we bought 1'x1' boxes and painted them red with gold "ribbon". We sourced the big bows from Target and hot glued them in place. The trickiest part was attaching the handles. Originally we wanted elastic, but it wasn't durable and fit with the choreography. I super glued a piece of luan on the side that the handle goes on so the bolts had something to grip onto. I attached the bolts and secured them with nuts.


In Deck the Halls, we get to have audience participation in a wrapping contest, but the catch is that they get to wrap a teammate. I sourced the utility belts from Amazon then hot glued ribbon and sequins. I printed out a image of the Home Depot logo and made a stencil, then painted our logo. Since we wrapping people, I sourced different necklaces, bracelets, glasses, and more so that our participants would be deck out in the holiday spirit. The other team, the all elf team, had sad decorations like a sash that says "happy holiday" and plain "nerd" glasses.

Peter Pan

Slightly
Tootles


In our production of Peter Pan, we wanted our Lost Boys to be puppets. We had a Raggedy Ann sewing pattern in stock, so I used that as a base. I made our Toodles legs longer and arms shorter than our Slightly so that they had individuality. I used the clothes pattern provided, then made their noses with scrap fabric. We used dowels for that their joints worked properly. I dyed them a brown so that they weren't pasty white, and finally added scraps of fabric for their hair and sewed on eyes.
To make the cake, I used scrap styrofoam and had some in the middle to add height. Then I used joint compound as icing, filling in the gaps. I put JC in a ziplock to make dollups of icing and the drips on the top. Lastly, I painted everything to make it look gross but appetizing to the characters.


UV paint aftermath
Our director, Ben Liebert, wanted to have stuffed animals to represent each character "flying" since we couldn't have them actually fly, and to fit that our actors were playing with the set. When they get sprinkled with Pixie Dust, our actors would hold them with their hands and make them soar throughout the air. We had doubles of the stuffed animals attached to sticks so that they were smoothly flying to Neverland. We painted each stuffed animal with UV paint so that we knew that we were transitioning to Neverland.

Testing UV teddies during tech
Small Mouth Sounds


In the script, the Institute is nameless, but in our production we wanted ours to be branded. I collaborated with the director and scenic designer on our vision then created the logo in Canva. I used a Cricut machine to make iron on vinyl patches, then put them on the pillow cases, blankets, and towels. We first wanted to do embroidery, but using the vinyl gave that the Institute is put together on the surface but really unorganized and cheap.


Scenic Designer: Emma Bayless
Paint Charge: Jenny Joleen
All the packets had a menu, room assignment, map, brochure, and schedule. Map made on Photoshop by Ivy Clamons.
Bonsai tree made out of wire, masking tape, paper mâché, and hot glue for the bark texture. Leaf buds, moss, and pot were sourced.

Fire safety! My supervisor and I taught our crew member how to use the fire extinguisher, and the actor safely hold the long match. We burned a piece of paper, and inside the bowl was a water cup surrounded by sand with fairy lights on the walls to convey flames.

The Wolves

Being Prop Manager, I had to make quick decisions during tech. At one point, one of the characters has a nose bleed, but the blood we had at first stained skin. I went over to the shop and made a fake blood recipe that I've created for Gloria. Being able to make quick choices benefited me to not be overwhelmed in situations like this, but how to approach in a collective manner.

To make the inhaler, I used my campus' MakerSpace and had access to a 3D printer. I upload the file and it took about 2 hours to print. I sanded and painted to look more realistic, and later glued stickers to it so a teenage girl decorated it.


